
#
12-05 Hydraulic Braking System Fluid Replacement
#
1 – Emptying the brake fluid reservoir
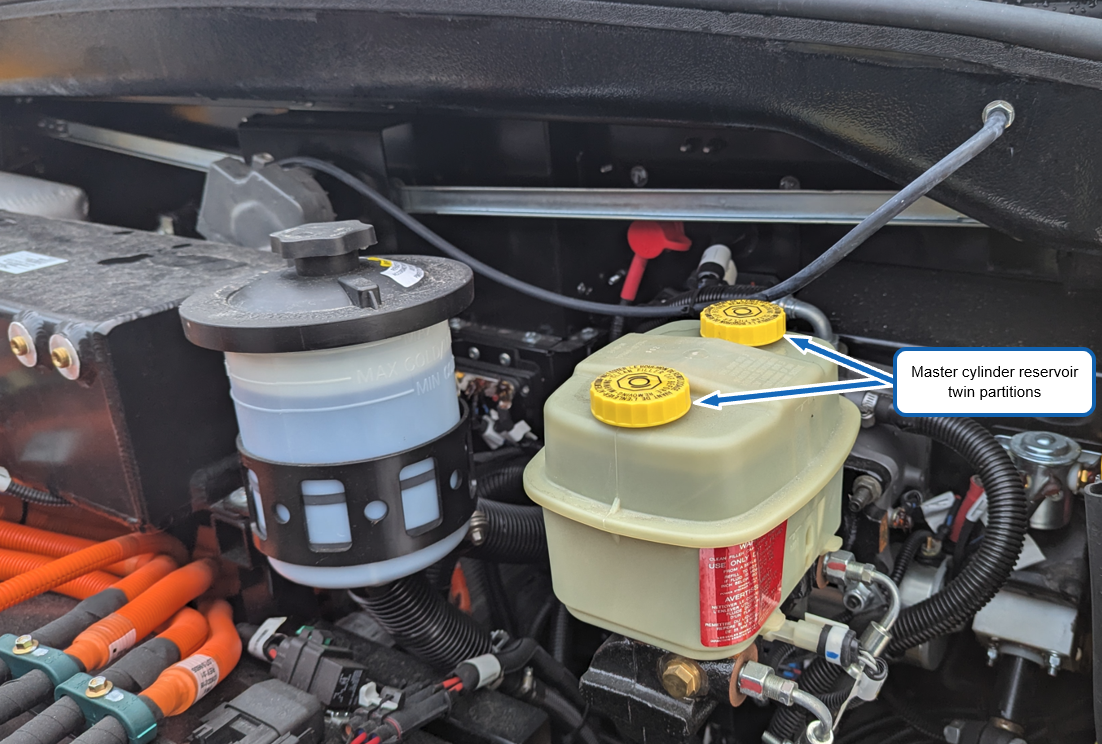
Using a syringe or another tool, empty the brake fluid reservoir of most of its content.
Don’t depress the brake pedal until the reservoir is filled again.
Fill the master cylinder reservoir with fresh DOT3 fluid.
#
2 – Pressurize the brake fluid circuit
Install a pressure bleeder tool on the master cylinder reservoir cap. DOT3 brake fluid level should be at the “Max Fill” line.
#
3 – Bleeding sequence
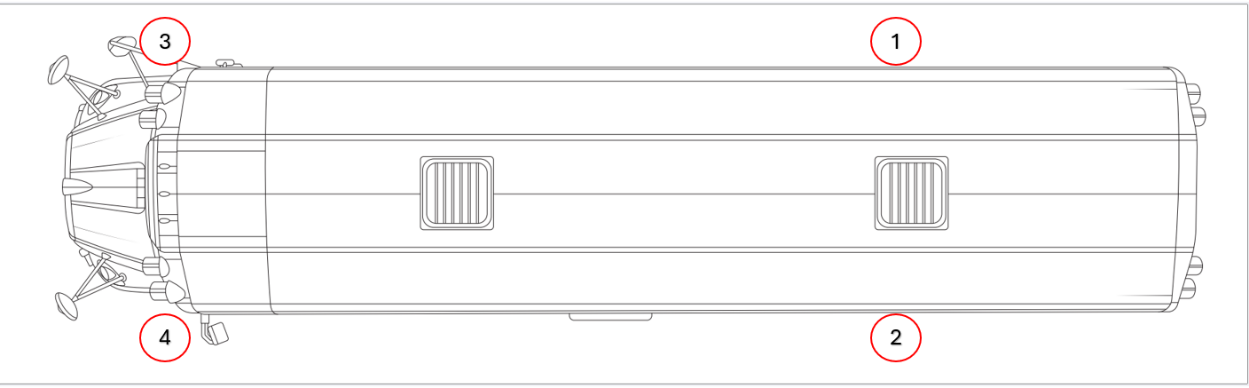
Perform a bleed of the hydraulic brake circuit starting with the bleed nipple furthest from the master cylinder, and proceeding in the following order:
1: Rear passenger side
2: Rear operator side
3: Front passenger side
4: Front operator side
#
4 – Bleeding procedure
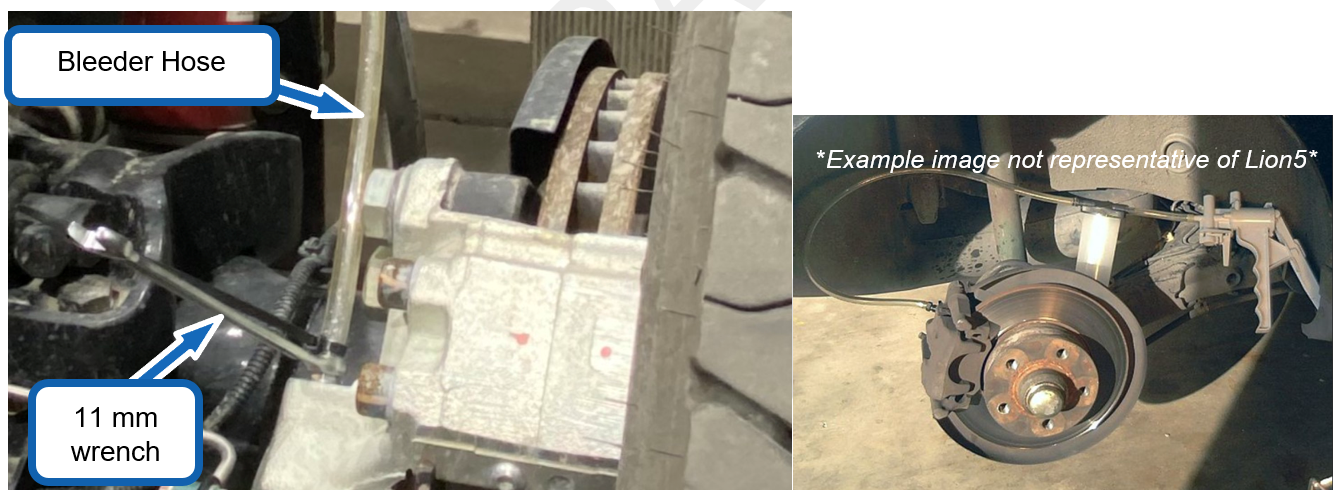
Locate the bleed nipple on the caliper on the rear passenger’s side.
Install a transparent tube on the bleed nipple (Figure 3).
Pressurize the master cylinder with the pressure bleeder tool. Don’t exceed the recommended pressure.
Loosen the bleed nipple just enough for brake fluid to start flowing into the tube.
Watch the transparent tube fill with brake fluid. Allow the line to bleed until fresh fluid (lighter in colour) is seen in the tube. Then tighten the bleed nipple and disconnect the tube.
Repeat bleeding steps I to V for all other bleed points in the order shown in step 3.
Do not let the brake fluid level in the reservoir get too low as you perform the purge. Frequently add more DOT3 fluid in it to keep it topped up until the process is finished.
#
5 – Bleeding the ABS module (if required)
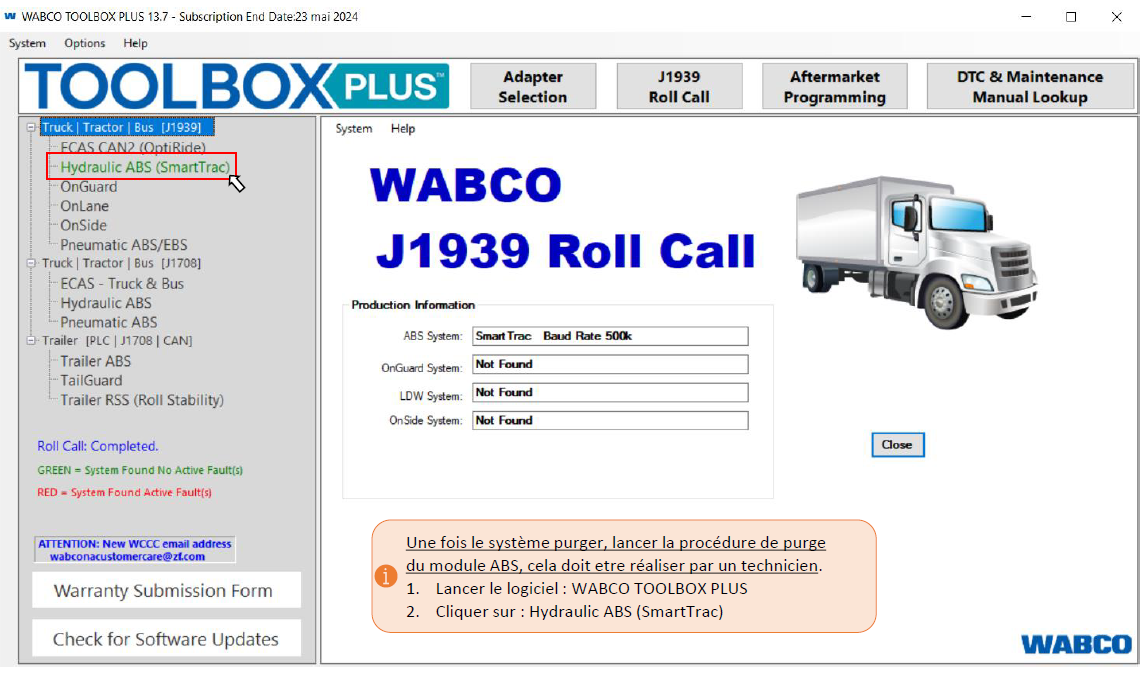
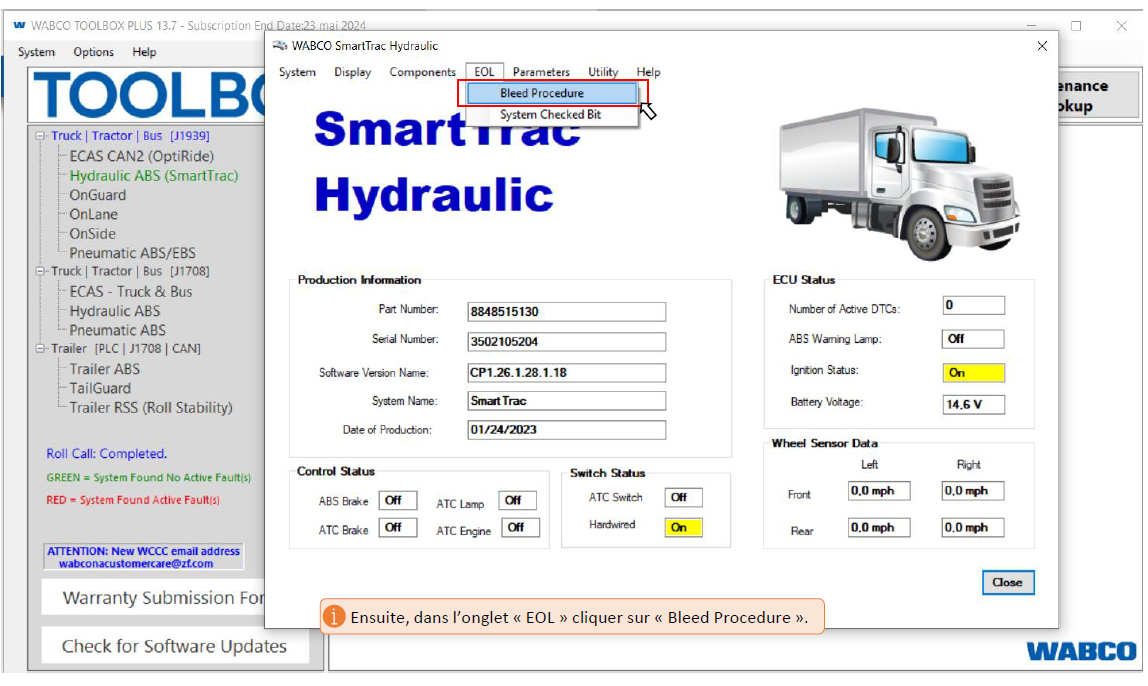
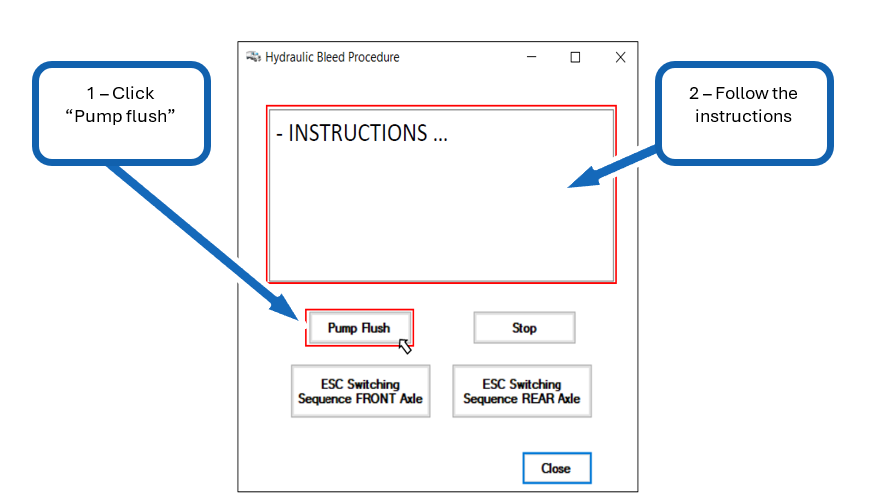
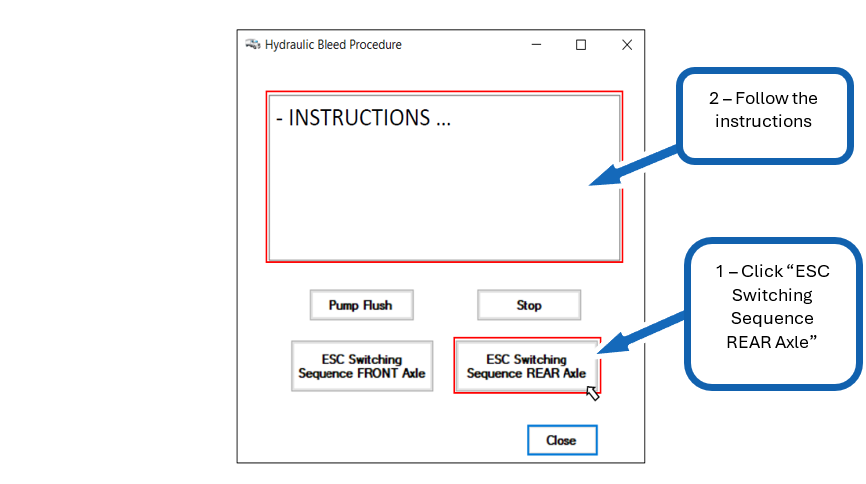
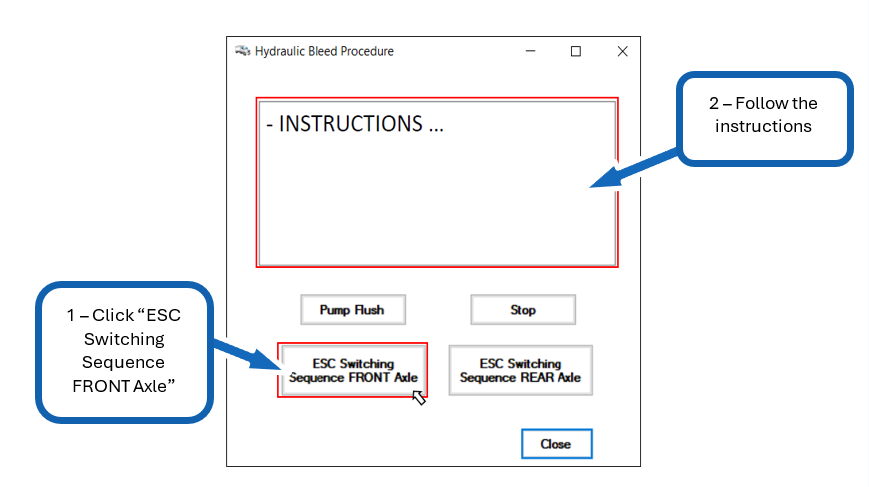
In case air entered the brake lines (brake line component replacement, fluid level too low in master cylinder), you shall also bleed the ABS module using the Wabco software tool.
Connect to J1939 via the communication port inside the cabin and open WABCO Toolbox. Follow the instructions below.
#
6 – Final bleeding of the calipers (if required)
After performing the ABS bleeding sequence, bleed the whole system again by repeating steps 3 and 4.
#
7 - Brake Pedal Verification
Turn the start key to “ON”, press down firmly on the brake pedal, and turn the key to “Start”. Press hard on the brake pedal to assess its responsiveness.
A properly bled hydraulic brake system should exhibit a firm and consistent brake pedal feel. The pedal should engage promptly with minimal travel, providing a sense of resistance that increases as the pedal is depressed further. Any sponginess is indicative of air in the brake lines that must be bled properly.
Additionally, the pedal should not sink to the floor when pressing it down and pressure is maintained; this could signal a leak. If there is suspicion of a leak, inspect all brake circuit connections.
Do not press hard on the brake pedal for more than 20 seconds. This could cause the brake booster or hydraulic fluid to overheat.